Low light is where drone cameras struggle most. The physics are unforgiving: small sensors, fixed apertures, and the inevitable trade-off between ISO noise and motion blur. Push the exposure too far and the footage falls apart. Play it safe and the image is too dark to use. Neither outcome is what you planned for when you flew out at dusk.
The good news is that low light drone footage is a two-part problem. What happens in the air determines the quality of the data you’re working with. What happens in post-production determines how far that data can be taken. Getting both right is what turns a difficult lighting situation into footage worth keeping.
Part 1: In-Air Techniques to Maximise Low Light Quality
No post-production tool recovers what was never captured. The shooting decisions you make during the flight set the ceiling for everything that follows.
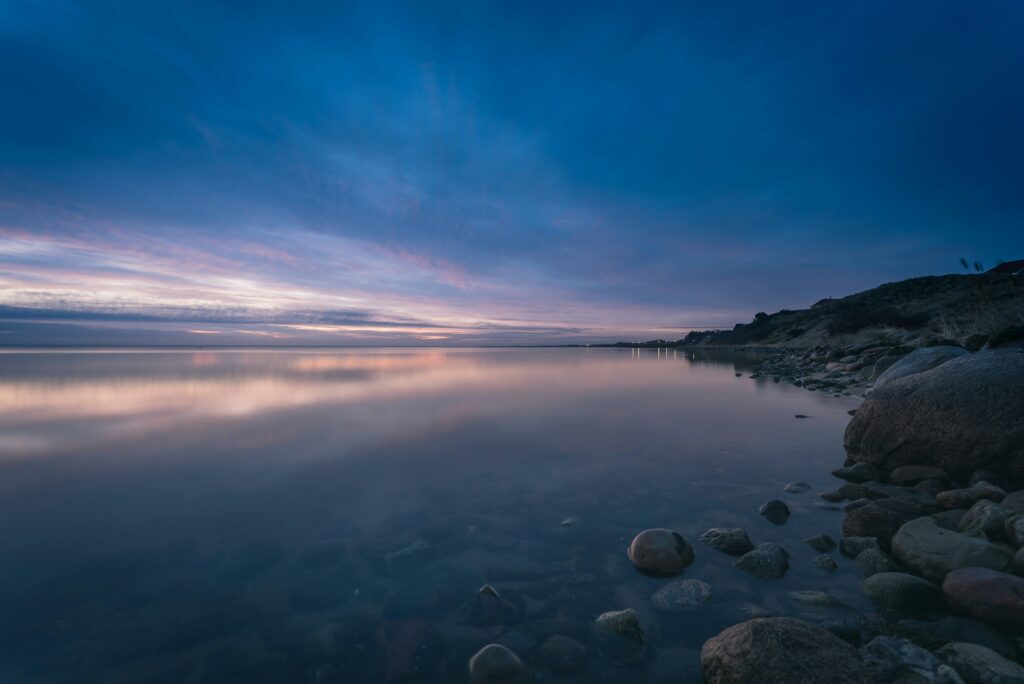
Shoot During Blue Hour, Not Full Darkness
The minutes just after sunset or just before sunrise are called blue hour. They offer more even, usable light than full darkness. Shadows are softer, contrast is lower, and the overall dynamic range is more manageable for a small sensor. If you have flexibility in your flight timing, blue hour consistently produces better raw material than shooting into the night.
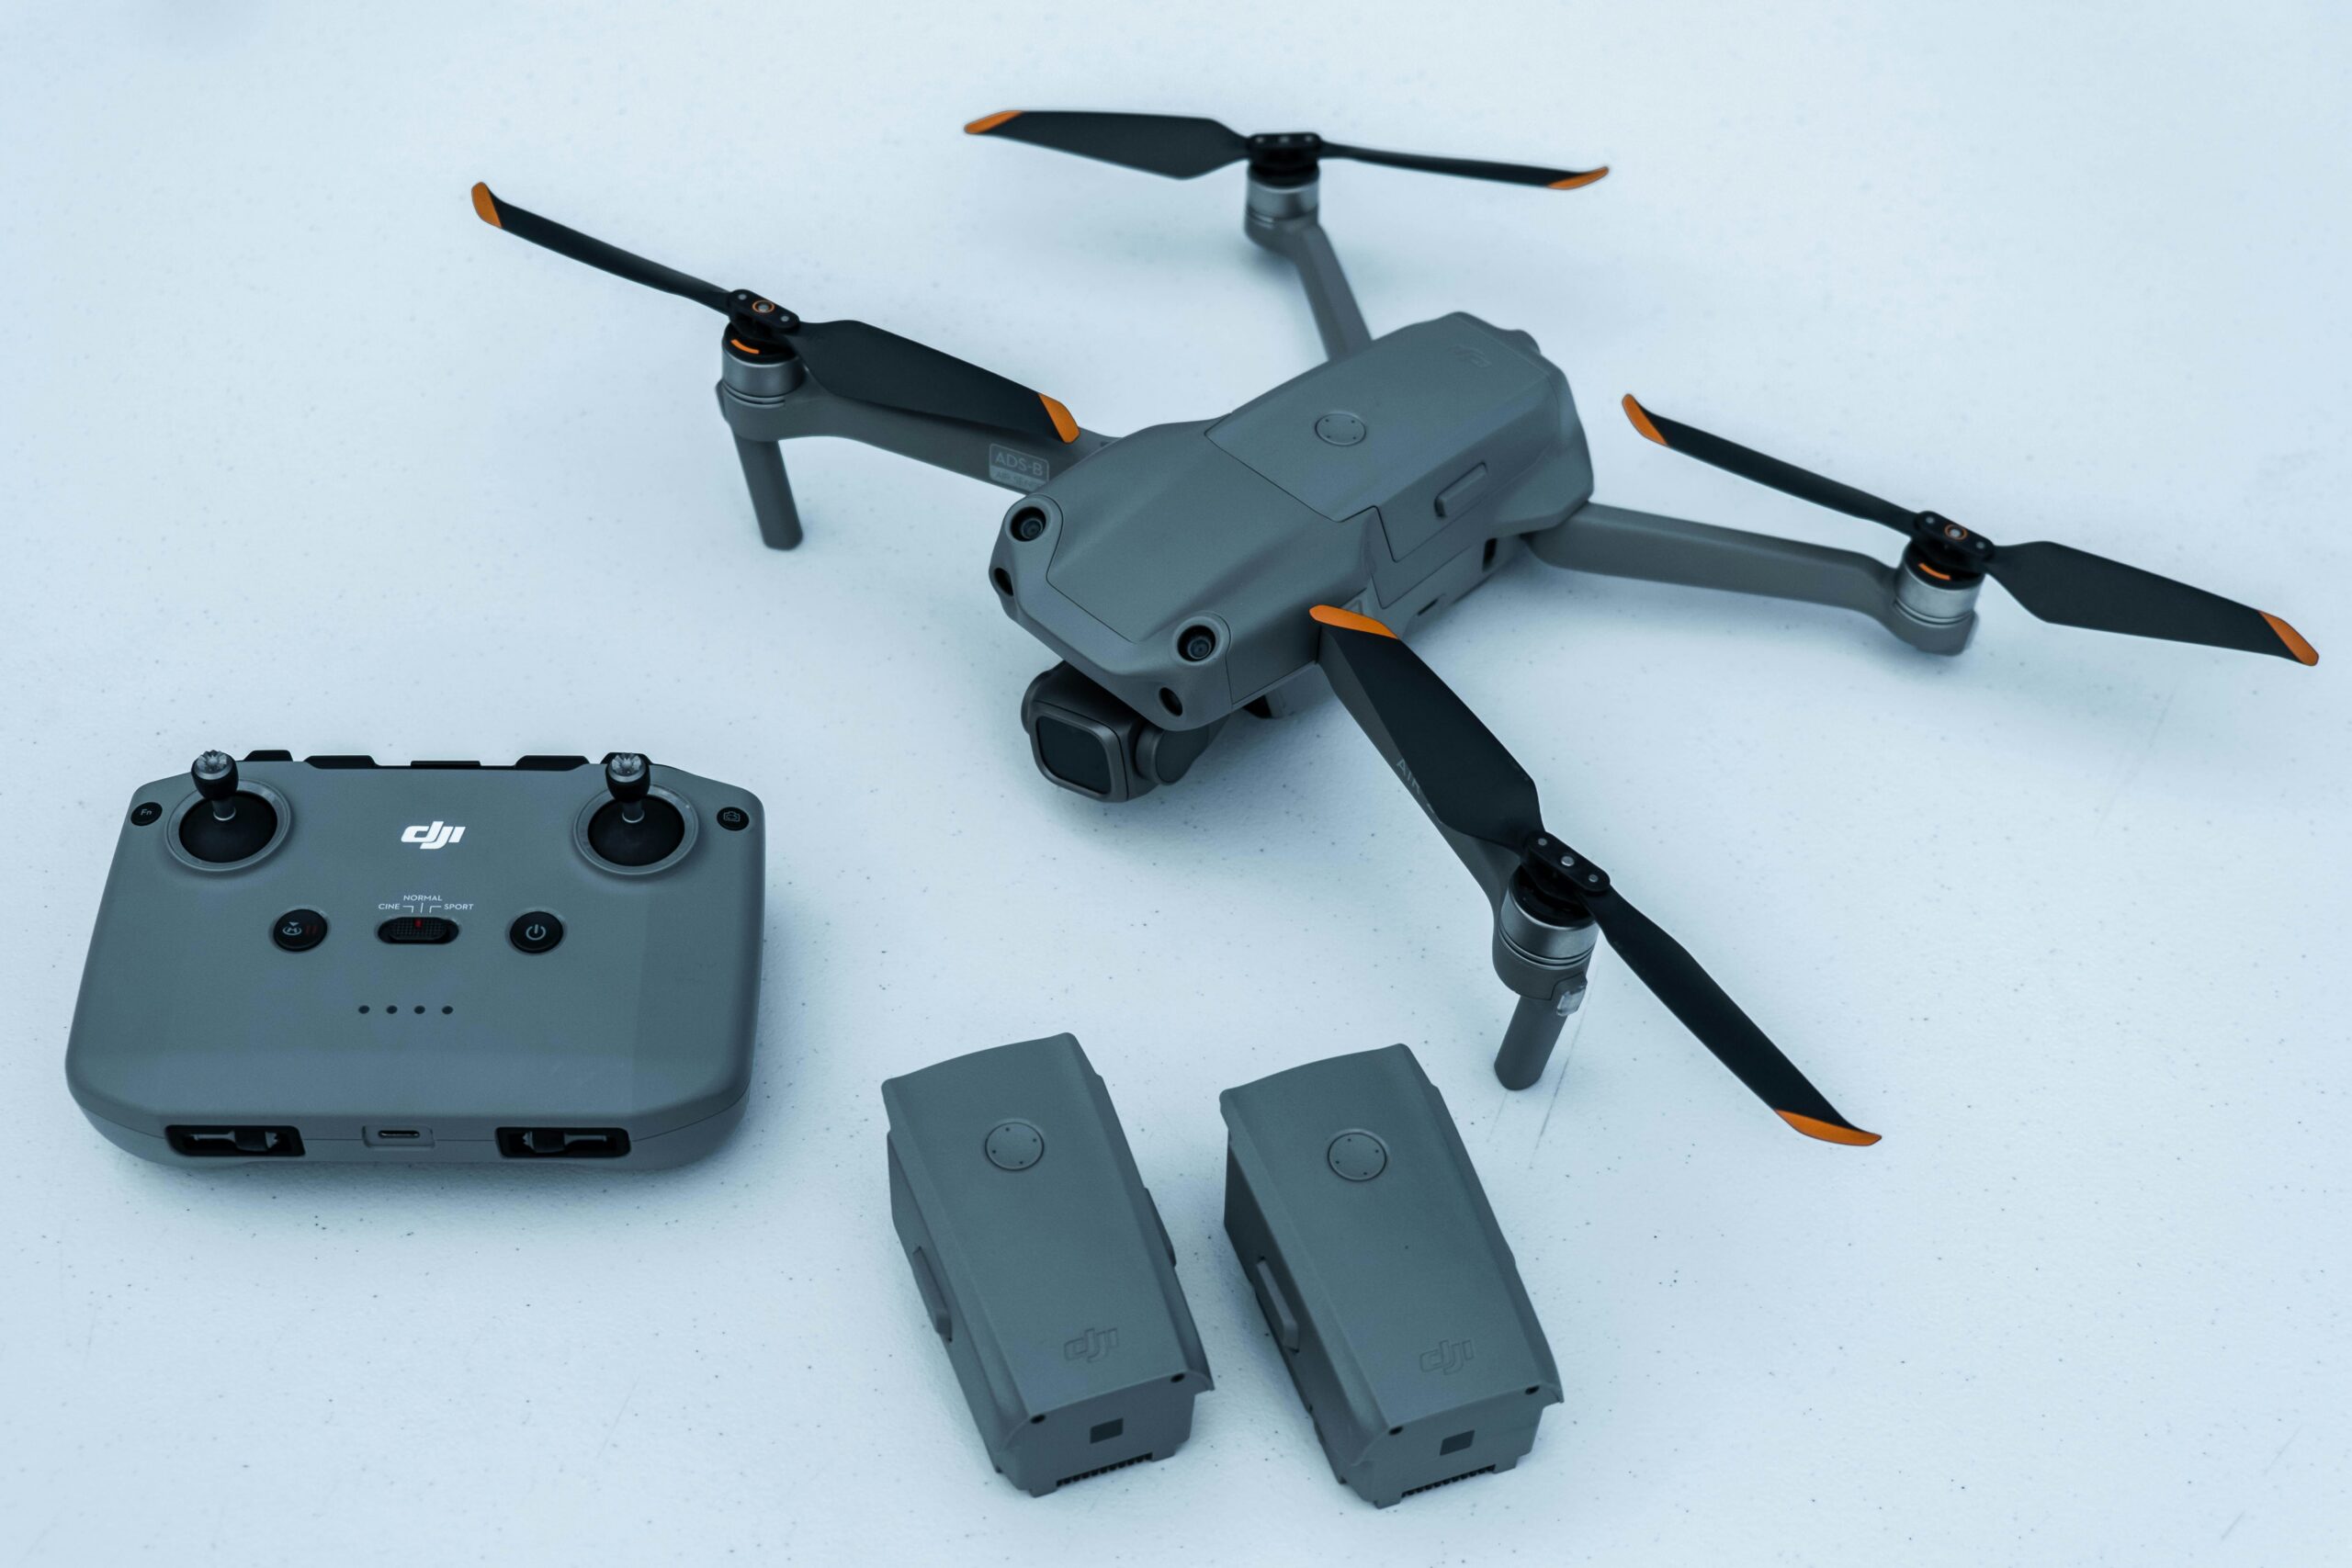
Master Manual Camera Settings
Auto settings in low light are unreliable. Take manual control of every parameter that matters.
ISO: Keep it as low as possible, ideally between 100 and 400. Auto ISO in low light will spike unpredictably, introducing noise that compromises the entire shot. Set it manually and hold it there.
Shutter speed: Follow the 180-degree rule as a baseline. Shutter speed should be approximately double your frame rate. For 24fps, that means 1/50s. Adjust slightly faster if there’s significant drone movement to avoid motion blur, but be aware that faster shutter speeds reduce the light entering the sensor.
Frame rate: 4K at 24 or 25fps generally outperforms higher frame rates in low light. Lower frame rates allow slower shutter speeds, which means more light per frame. The trade-off is less flexibility for slow motion in post, but the image quality gain is usually worth it.
Color profile: Shoot in D-Log or D-Cinelike if your drone supports it. These flat profiles preserve more detail in shadows and highlights than standard color profiles, giving you significantly more flexibility when you bring the footage into post-production.
ND Filters in Low Light
The standard advice is to remove ND filters entirely in low light to allow maximum light through. That’s correct for most situations. The exception is twilight shooting where you need to maintain a slower shutter for intentional motion blur — in that case, a very light filter like ND4 or ND8 can help manage the exposure without pushing ISO higher.
Part 2: Post-Production Enhancement with TotalMedia VideoEnhance
Shooting well in low light gives you the best possible source material. Post-production is where you address what couldn’t be controlled in the field: the noise, the lost detail, the color degradation that low ISO shooting couldn’t fully prevent.
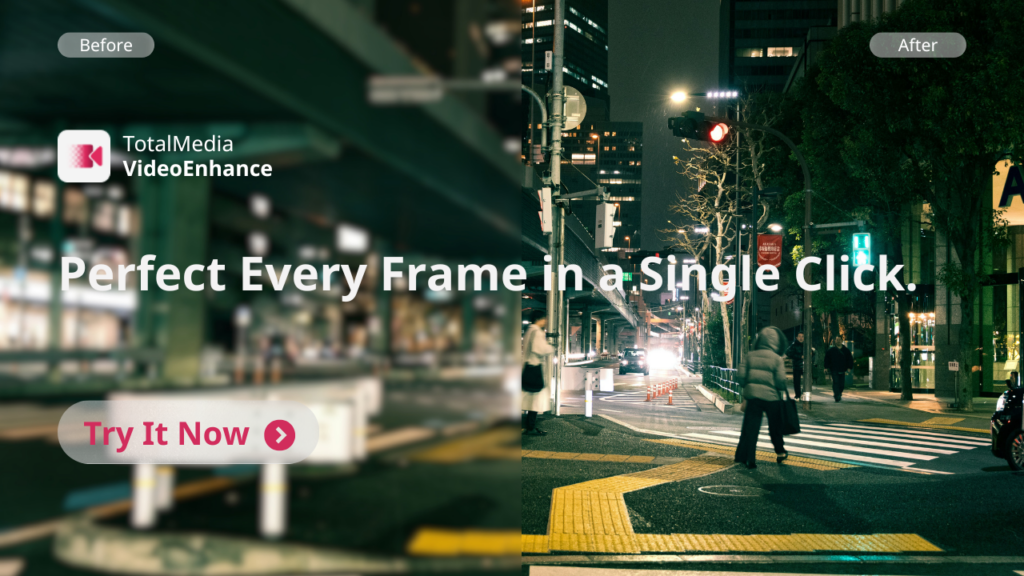
TotalMedia VideoEnhance uses an AI Smart Enhance engine that analyzes each frame individually rather than applying uniform filters across the clip. The difference matters on drone footage specifically because the noise patterns, detail loss, and color shifts in low light footage are uneven. They vary frame by frame, scene by scene. A static filter treats every frame the same. An AI engine treats each one according to what it actually contains.
What AI Smart Enhance Does for Low Light Drone Footage
Noise and grain removal. Low ISO drone footage still accumulates noise in shadow areas, particularly in H.264 or H.265 encoded files where compression amplifies the problem. AI Smart Enhance identifies and removes that noise selectively, distinguishing between grain and genuine image texture like building surfaces, tree canopies, or ground detail. So the cleanup doesn’t cost you the detail you’re trying to preserve.
Compression artifact removal. DJI’s onboard encoding is efficient but not lossless. Compression artifacts like blockiness in shadow areas, color banding, smeared edges are common in low light footage where the encoder struggles with high-noise frames. AI Smart Enhance cleans these up as part of the same processing pass.
Color and contrast restoration. Low light footage often comes out flat, with muted colors and reduced contrast. The AI engine restores color balance and contrast automatically, recovering the warmth of city lights, the depth of shadow areas, and the tonal range that flat color profiles were designed to preserve.
Detail reconstruction. Fine textures, such as the texture of a building facade, the individual elements of a tree line, the surface detail of a landscape, are often the first casualties of high-ISO noise and heavy compression. AI Smart Enhance reconstructs these details rather than simply softening over them.
Adding Frame Interpolation for Smoother Motion
If your footage was shot at 24fps and feels choppy during fast pans or complex motion, Frame Interpolation generates new intermediate frames using motion analysis. The result is smoother playback without the duplicated-frame look that basic speed adjustments produce. For aerial footage where slow, sweeping movements are the norm, this is less frequently needed. But for faster-moving shots or turbulent conditions where motion is uneven, it makes a visible difference.
Upscaling for Modern Displays
If your footage was captured at 1080p or lower due to sensor limitations or recording constraints, AI upscaling brings it to 4K with synthesized detail rather than simply enlarging the existing pixels. Even for footage already captured at 4K, the Pro plan’s 8K output option is worth considering for archival purposes or large-screen delivery.
Step-by-Step: Enhancing Low Light DJI Footage with TotalMedia VideoEnhance

1. Upload your footage. Open TotalMedia VideoEnhance in your browser or via the desktop app. Upload your DJI clip in MP4, MOV, or other supported formats. No pre-conversion required.
2. Select AI Smart Enhance. This is the default model and the right starting point for low light drone footage. It addresses noise, artifacts, color fade, and detail loss in a single automated pass — no module selection or slider configuration needed.
3. Set Frame Interpolation if motion is uneven. If the clip has choppy or stuttering motion, use the Frame Interpolation dropdown to select a higher target frame rate. The AI generates new frames based on motion analysis rather than duplicating existing ones.
4. Choose your output resolution. Select 200% for 1080p output or 400% for 4K. Pro users can access 8K. For low light footage that was already captured at 4K, keeping the output at 100% preserves the original resolution while the enhancement addresses quality — upscaling is most useful when the source resolution is limiting the result.
5. Use the split-screen preview. Before committing to the full render, drag the divider across a shadow-heavy or detail-rich section of the frame. Low light footage shows the most dramatic improvement in these areas, and the preview renders at actual output resolution so what you see reflects the final result accurately.
6. Click Enhance and export. Processing time depends on clip length and resolution. A live progress indicator shows completion percentage throughout. Download the enhanced output in MP4 when complete.
7. Colour grade in your editing application. TotalMedia VideoEnhance handles quality restoration. Colour grading — applying LUTs, correcting for D-Log, adjusting contrast curves, adding a creative grade — should be done in a dedicated editing application like DaVinci Resolve or Adobe Premiere after the enhanced footage is exported. Running the grade on clean, enhanced footage produces significantly more consistent results than grading noisy source material directly.
Common Mistakes to Avoid
Don’t push exposure too far in-camera. A slightly dark but clean image gives post-production more to work with than a brighter but noise-saturated one. The AI can recover detail from controlled underexposure. It can’t fully undo the damage from severe noise.
Don’t over-sharpen in post. Sharpening after enhancement should be minimal and applied in your editing application, not stacked on top of the enhancement process. Aggressive sharpening on already-processed footage creates halos and accentuates any remaining grain.
Don’t skip the preview. The split-screen preview in VideoEnhance exists precisely for footage like this, where the enhancement effect varies significantly depending on how dark or noisy individual sections are. A few seconds of preview time prevents committing to a full render that doesn’t deliver what you expected.
Don’t neglect audio. Low light scenes — dusk cityscapes, blue hour landscapes, night flights — carry a specific mood. Pairing strong visual enhancement with appropriate, high-quality audio completes the experience. Enhanced footage with poor or mismatched audio still reads as unfinished.
A More Usable Shooting Window
The practical outcome of combining careful in-air technique with AI post-production is a significantly wider usable shooting window. Flights that previously produced footage too noisy or degraded to use become workable. Blue hour extends into dusk. Conditions that felt marginal become viable.
That’s the real value of getting both parts right.
If you’re also working with footage from other cameras that needs quality improvement before editing, our related guide covers the full enhancement workflow:How to Fix Shaky Insta360 Video and Noisy Sony Low-Light Footage.
Ready to see what your low light drone footage is actually capable of? Try TotalMedia VideoEnhance today — in your browser or as a desktop app.
Frequently Asked Questions
VideoEnhance accepts standard video formats including MP4 and MOV, which is how D-Log footage is typically exported from DJI drones. The AI Smart Enhance engine processes the footage as delivered. For D-Log colour correction and LUT application, use a dedicated editing application like DaVinci Resolve after the enhancement step — colour grading and technical correction are separate from the quality restoration that VideoEnhance handles.
It can produce meaningful improvement, but the degree of recovery depends on how severe the noise is. AI Smart Enhance reconstructs detail based on what remains in the frame — if the noise is heavy enough to obscure the underlying image, the result will be better but not perfect. The strongest results come from footage where good shooting technique has minimised the damage and post-production handles what couldn’t be controlled in the field.
Before. Enhancing first gives the colour grade a cleaner surface to work with — noise interacts with colour grades in unpredictable ways, making it harder to achieve consistency across clips. Run VideoEnhance first, export the clean output, then bring it into your editing application for grading.
Yes. TotalMedia VideoEnhance supports a multi-file queue through the sidebar. Load all clips from a flight session, configure settings, and process them together for a consistent result across the entire sequence — which matters particularly for low light footage where matching the look across clips is part of the editing challenge.